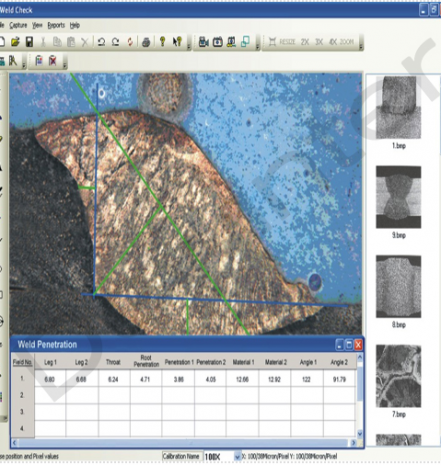
Weld Penetration Analysis Software-Model Weld Check
Weld Check software is a powerful easy-to-use tool that enhances your ability to quickly and efficiently handle your most critical welding measurement and documentation software needs. Your workflow and productivity are greatly improved. Weld Check has been designed with your welding cross-section measurement needs in mind. Weld Check’s measurement module allows you to quickly measure such items as your fillet welds, throat, leg lengths and penetration.
Use Weld Check Measurement Tolerance indicator to improve performance by having the software automatically tell you if a measurement is out of the tolerance range.
The following report concerns the analysis of a fillet weld, a weld of approximately triangular cross section joining two surfaces at approximately right angles to each other. Important measurements made by the distance from the root if the fillet to the center of the face (or throat), the distance from the root of the joint to the junction between the exposed surface of the weld and the base metal (or leg), the angles and the root penetration.Measurements that could have been done with the same ease or similar sample are among others : depth of HAZ (heat affected zone), area of HAZ, joint penetration, phase counting, etc.
The measurement remain uneffected if the image is zoomed for better accuracy. T he magnifier tool is also available which can be switched on any part of image. The tool zooms only the region surrounding the cursor allowing to increase the drawing precision while still seeing the whole sample.
Image analysis system can measure a sequence of specific characteristics or welded parts. The system brings the good tool with the good color when it’s the time for the operator to use it.


